The post Chaperone Management appeared first on Synthesis VR.
]]>The Chaperones Management functionality is getting an update to Environment Profiles (click)
The multiple “Experience Types” support is in Synthesis since our first days. W have since extended the billing capabilities and allowed smart involvement of the same set of stations in functionary different activities. In other words – you can run “Room Scale” and “Free Roam” on a same group of PCs and have your billing to act exactly the way you expect it to work.
As part of our grown, we are now automating the Chaperones, working once again to solve another piece of involved manual work.
How it works
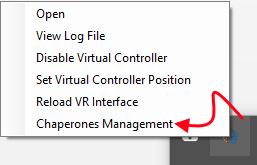
In the Windows tray, right mouse click on the SynthesisVR icon and select the “Chaperones Management” option.
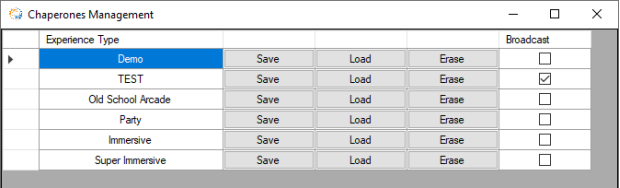
Click on the “Save” button for each of the experience types. The current chaperones would be saved locally and automatically restored when a new session is started for the specific experience type.
This has to be done once for each of your VR stations.
If the given experience type is a Free Roam (meaning, multiple stations sharing the same physical space), you have to pick up one of the stations as a master and enable the “Broadcast” option for it. In that case, at the start of the session, not only will the chaperones would be restored on the current PC, but they will be broadcast through the network and automatically applied on all the other PCs involved in the session.
The post Chaperone Management appeared first on Synthesis VR.
]]>The post Understanding Idle Playback and Troubleshooting appeared first on Synthesis VR.
]]>
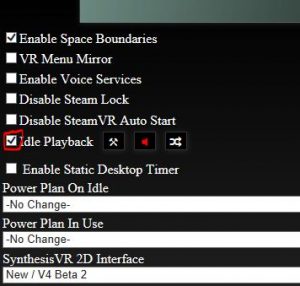
Then Enable Idle Playback as shown below:
Modifying Idle Playback and Trouble Shooting
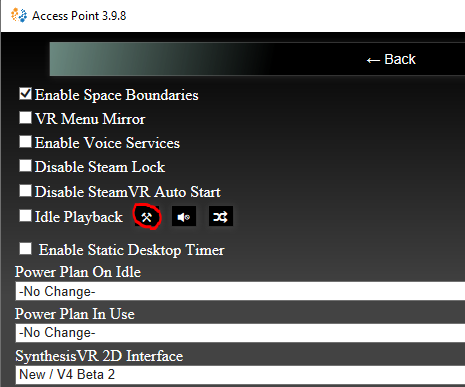
If you want to modify existing videos or if you want to add videos of your own Click the Tool Icon as shown below:
This will bring up the popup shown below:

You can go to the default folder as shown above and add your videos or you can create a new folder and have only the videos you would like to be showing.
Note: If for some reason you deleted this folder and wanted the videos in the default folder, you can create folder and name it videoCache in the same path as shown above and then Refresh the SynthesisVR Access point. This will download all the trailers associated with the games installed on that PC.
Controlling which trailers to play on Idle Playback
There could be trailers of games that you might not want to display on your TV or for some reason if you do not want to show a certain trailer of a game or an experience, Please do the following:
Login to your SynthesisVR administration Panel
*If you have Simple Menu activated
On the left menu Click Administration – Your Games –

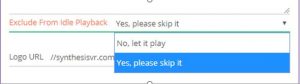
Click on the game you want to exclude from Playback – This will open up the below pop up – Select Yes, please skip it from the Exclude from Idle Playback dropdown.
*If you have Advanced Menu activated
On the left menu Click Administration – Games & Licensing – Your Games and follow the same steps as mentioned above.
Black screen during Idle Playback
If you have idle playback enabled and the videos are not playing properly or if you see a black screen with a red bar running on top, this means the appropriate trailers and images have not downloaded properly and certain video files might have gotten corrupted. This could happen for various reasons. To rectify this:
- Go to the folder where your videos are saved, this could be the default videoCache folder or a folder you have created.
- Sort the files inside this folder by Size.
- Permanently delete all the files that are below 2mb in size.
- Restart SynthesisVR Access Point app
The post Understanding Idle Playback and Troubleshooting appeared first on Synthesis VR.
]]>The post Voice Chat Service appeared first on Synthesis VR.
]]>How do I enable the Voice Chat?
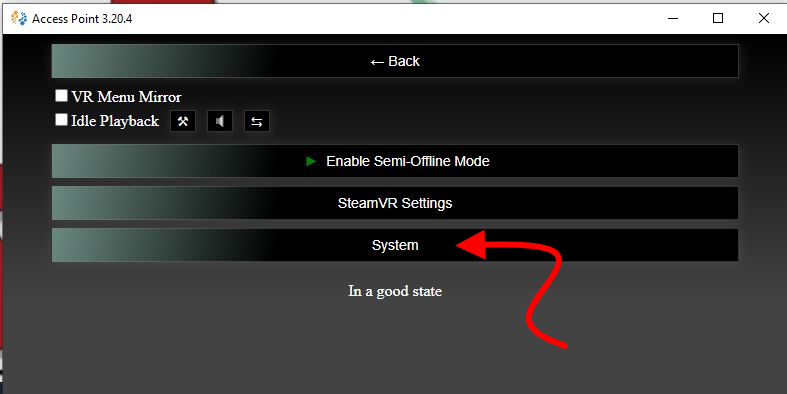
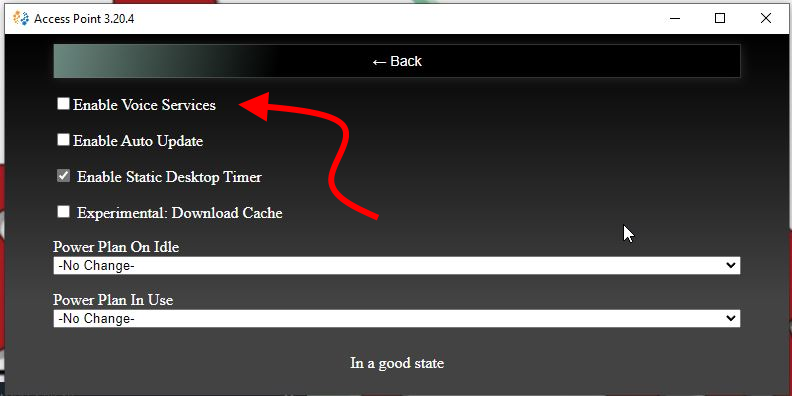
In the Settings of the Access Point App on each of your stations, choose select the “Enable Voice Services” item and that will start a new background task:
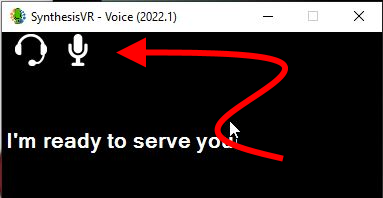
This will then launch the Voice Chat service and the interface.

If you open the interface, you can change the microphone and headphone if necessary:
That’s mostly it. Going forward, people within the same session will be able to hear each other regardless of whether they are in a multiplayer game or not.
Customers, from within the VR interface, can also turn this off (or back on) for their individual station if they don’t want to be part of the conversation.
From the V3.x interface: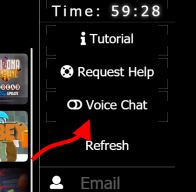
From the V4.x interface:
Using the Voice Chat to talk to your customers
All the Voice functionalities are based on the related Voice Over IP (VoIP) protocols and work via:
1) Browser
2) Third party apps for Windows ; Linux ; Android ; iOS
3) Standalone VoIP devices
4) Regular phones with ATA adapters
Configuring a third party app
Although all apps will have a different interface, they have a couple common configuration parameters. Lets use the Zoiper app as an example (available for all 4 major OS).
1) Install Zoiper (https://www.zoiper.com/)
2) Go to “Settings >> Create a new account”
3) Select “SIP” as “Account type” and click on “Next”
4) Fill the following credentials:
a. User / user@host => 1000@192.168.1.105 (replace 192.168.1.105 with the local IP of the PC where you installed the SynthesisVR’s “VR Main Server” mode )
b. Password => 3420
c. Domain / Outbound proxy => [KEEP IT EMPTY]
5) On the next screen, enable the “Skip auto-detection” option and click on “Next” and then click on “Close”.
For Windows, we recommend the MicroSIP app (https://www.microsip.org/downloads):
Example MicroSIP account configuration: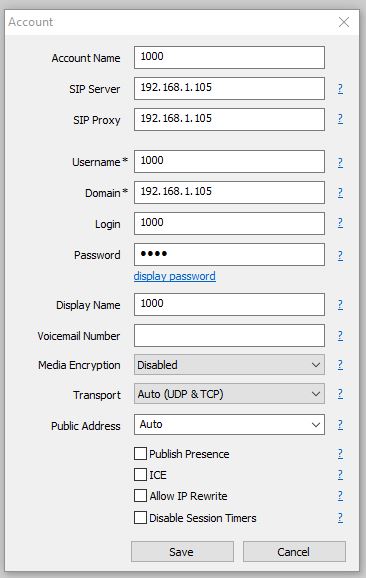
What numbers I can dial?
Each of your VR stations has an individual and unique “phone number”. If a station number is 10001:
1) Dial 99910001 to reach to the individual station alone. To do that, you don’t need an active session in place.
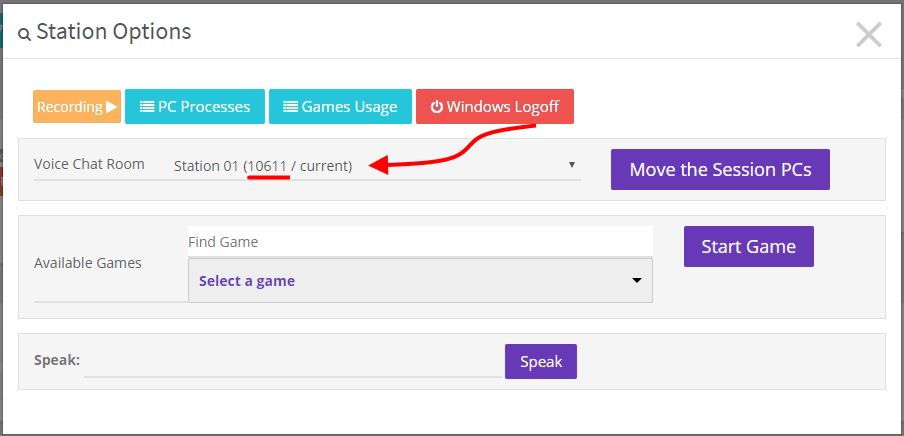
2) Dial 88710001 to reach to the conference call and talk with all the players in a session. The full conference session number is displayed on the “Your Arcade” page of your Dashboard and clicking on the gear icon in the top right of a station: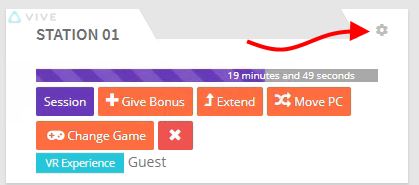
Additional notes:
1) The 1000 number is reserved for the Operator’s account. Its password is 3420.
2) If you have the “VR Main Server” and “VR Station” modes both installed on the same PC, you may experience chunky audio with that particular station.
3) If a customer mutes the Voice Chat, you are still able to call into that individual station and have a conversation.
4) Third party firewalls and Antivirus software may block the audio. Please ensure the following network ports are not blocked (don’t forget to check your router as well):
a. VR Main Server – TCP – 8021 ; 7443 ; 5066 ; 5060 ; 8020
b. VR Main Server – UDP – 16384-32768
c. VR Station – UDP – 5020 ; 4000-5000
The post Voice Chat Service appeared first on Synthesis VR.
]]>The post Synthesis VR Setup – Add More Stations To Your Location appeared first on Synthesis VR.
]]>Once your Access Point(s) are installed, head to Administration >> Arcade Setup >>Billing

Be sure to select the proper subscription in the Essential section that is found in the “Add” tab. If subscribing more stations to a trial, be sure to select the SynthesisVR Trail subscription option.
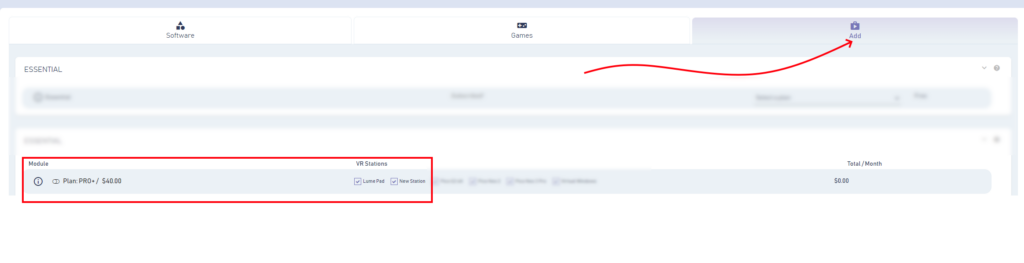
Once you select the subscription you want, be sure to select the correct stations and make sure the total on the right is correct (if adding to a trail, make sure it shows $0.00). Scroll down to the bottom and click on the Subscribe Now button.
Once your station(s) have been subscribed, you’ll need to head to the VR Devices section found here.

You’ll need to click on the Edit button to open up the station information and add (or remove) the Experience Types you want to have this station be part of. This is also where you can assign a 3D Environment and Edit the Station Name (Title).
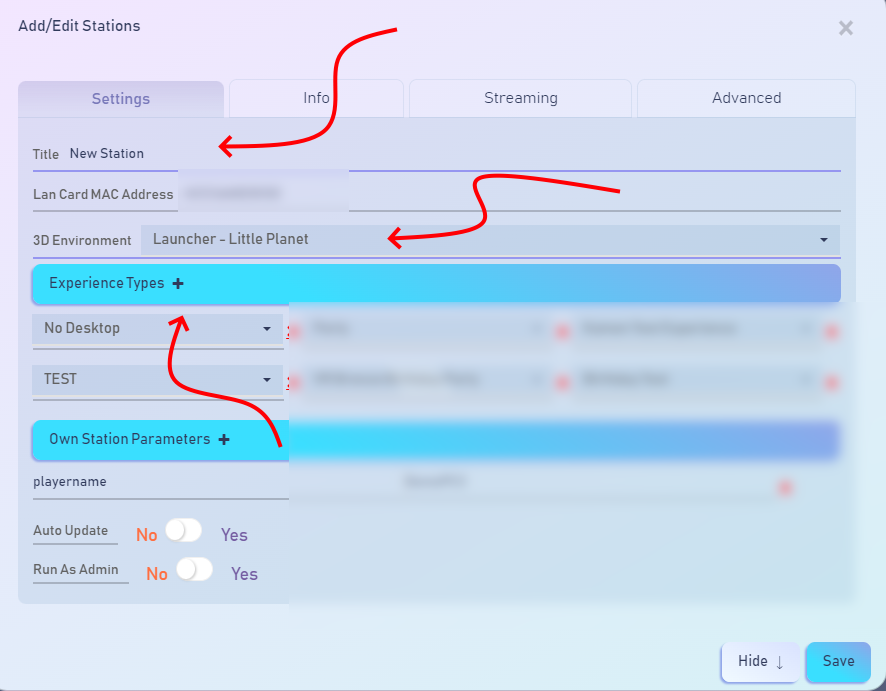
Your new station is now ready to launch sessions for the assigned experiences!
The post Synthesis VR Setup – Add More Stations To Your Location appeared first on Synthesis VR.
]]>